Minggu, 14 November 2010

A thankful foyer

Hello all! Hope you had a great weekend! We are DONE with marching band season (so proud of them!!) and I now have my hubby back…for approximately two weeks. :)

I haven’t done anything crafty in a while and last week I was feeling my mojo creeping back…so I got busy on a quick Thanksgiving project for our foyer.

I’ve been admiring the cute “Thankful” banners I’ve seen over blogland lately, and figured it was high time I made one of my own. I picked up about $3 of paper from Hobby Lobby:

And warmed up my sah-weet Silhouette machine:

My original thought was to do some circles, then put leaves in pretty colors over those, with letters on the leaves to spell my thankful message:

But after I cut out the leaves, I realized they were going to be way too small for the letters. Plan B was to cut out additional circles a bit smaller than the original ones:

I love love LOVE that cardstock – I use it all the time. It’s got a simpler, lined side, and a side (the one I prefer) with a linen-like texture to it. And aren’t those scalloped edges too cute? (I purchased the design on the Silhouette site for a buck.)

When I was done cutting, I ended up with large and small circular cut outs, the leaves that I wanted to try to use, and the letters:

Normally I use spray adhesive for paper projects, but the glue stick was closer. :) It worked great!:

Using my hole puncher, I added two holes in each one, then strung the letters and little leaves on some twine. I absolutely LOVE how it turned out!:

Isn’t that so stinking cute?

I had the buffet in our foyer dressed for fall six weeks ago, but took it all down for the Halloween display. I just put everything back the way I had it, even though it’s only for a few days, week, couple of weeks till Christmas starts peeking out. :)

I plopped one of my (real) blue Cinderella pumpkins on some burlap:

Can you believe I’ve had that pumpkin for about eight weeks now? It’s still perfect! Crazy.

Back in August, I was strolling through Pier 1 and saw some beautiful faux leafy stuff, and it was gorgeous. I especially loved that it was really, really tall and full. I knew I’d need a few of them though, so I held off. (They weren’t really cheap.)

Imagine my glee when I saw something very similar at Hob Lob:

I think they were $3 each, half off? Wicked good. :)

When we were working on my father-in-law’s house a couple of months ago, I saw this beautiful amber glass piece and swooned:

Isn’t it gorgeous? Perfect for my fall display!

I filled it with little beady stuff, pine cones and acorns I’ve used through the years:

All together, with our new Give Thanks garland on the mirror, and it’s a lovely, warm welcome!:

You’ll notice my Cinderella pumpkin tower shrunk by one. I noticed the other day that the middle one had cracked and it was NASTY. Ew!

I can’t even believe the difference a year makes – this little bitty table just didn’t do it for that spot:

Thanks to Craigslist, I have a lovely new spot to decorate each season!:

Yippeeee! For that, I am thankful. ;)

I’ll show you a few more of my fall goodies soon, and then it’s all over folks – get ready for some magic!!!

Are you still working on fall decor? Has Christmas crept up around your house?

Thank you to my sponsor!:

Kamis, 11 November 2010

Making the old new again (spray paint love)

Well, since it was seventy-stinkin’-five degrees here today, I figured I may as well take advantage of it and spray paint something.

In my flip flops. And tank top.

Grrr.

I know…it’s awesome and all, but I’m already missing my sweaters. I was just getting used to cozy again. :)

Anyway, when we built our house, we upgraded the elevation, (exterior of the house) but didn’t add any extras to the curb appeal – landscaping, lights, etc. So I did a few updates soon after moving in:

I took out the cheapy bushes that were about two inches tall and replaced them with azeleas and lillies, then added landscaping lights and bricks, and installed window boxes.

MUCH better.  :)

I also replaced our look-away-from-the-shiny!! brass coach lights:

OK, they weren’t even as nice as that picture. They were way too small for the scale of our house and they were practically blinding us with their brassy-ness. Brassiness? Huh? Whatev. They were ugly.

Anyway, I replaced them with much larger versions that were a pretty, dark bronze color:

Well, they were a pretty dark bronze color. It’s been about six year since I installed them, and they sure look their age:

In my book, the only thing worse than shiny brass coach light is a pink coach light.

Back in the day, they matched the light on our porch:

We don’t get much full sun on the front of our house, so I chalk it up to the fact that they were fairly cheap inexpensive six years ago -- $40 each I think?

So because I still love the size and design of the lights, I had a little idea in my noggin. On a recent trip to True Value, I checked out the fantabulous spray paint aisle:

spray paint!

I know. Stop drooling. It rocks. If you can’t find it there, you can’t find it anywhere.

I knew I wanted the lights back to their original dark finish so they would pop off the brick. I checked out a few oil rubbed bronze options and it turned out my old stand-by can be used indoors and outdoors:

Thankyouverymuch Rustoleum! And True Value! Kisses.

I thought I could just take the top off the light fixture and remove the glass, but that wasn’t working. I had to pretty much take the whole thing apart:

I set all the parts aside and cleaned everything well. Even more of the finish came off as I cleaned:

And this is the part where I am taking pictures of a dirty paper towel in our front lawn, realizing my neighbors are wondering why in the world is Sarah standing outside taking a picture of a dirty paper towel in her front lawn.

I would love to know what goes through their heads. You know what…maybe I don’t. :)

I picked up a roll of paper at True Value as well, and taped it up all around each light:

YES…I know I could have just taken the lights down. But that would have taken more time than just slapping some paper up there. And it was extra fun because the paper taped to the garage caused quite a few what-is-that-chick-doing? looks as folks drove by. :)

A sweet little girl from down the street even walked down to ask why I had paper all over the house.

It’s hard to explain the power of spray paint to a sweet five-year-old. :)

I put the parts aside so I could spray paint them separately:

I did two coats on everything – making sure to use very short, light sprays. I didn’t even use primer – I figured if the ORB paint ever wore off, I’d rather the pinky tone show through than white primer. :)

The result?:

Oh. Em. Gee. LOVE:

oil rubbed bronze lights

I ended up giving the glass a good cleaning – wow, they were nasty. Now the lights are about ten times brighter, which is a bonus. :)

They pop off the house now, AND they match the porch light again too:

spray painted coach lights

I like the new finish even better than the old one, so I may spray the porch light as well.

I think coach lights this size in a similar look are going for at least $50 each now – so I figure I saved $100 by just painting them.

Can I get a hollaaa for spray paint? Whoop! Love it!

Now, I have no clue how this will hold up. Even though the can says you can use it outdoors, you never know…but even if they last till next summer, I’m totally happy with that!

It took about an hour to finish, so yet again, the investment was in my time. And one hour to save $100 works for me!

I think they look SO much better, yes?

Check out that clean glass! You can actually see the light bulb now -- I swear, it’s the little stuff that makes me so happy. :)

Have you saved some cash with spray paint lately? Spill it!


*I was one of the bloggers selected by True Value to work on the DIY Squad. I have been compensated for my time commitment to the program as well as my writing about my experience. I have also been compensated for the materials needed for my DIY project. However, my opinions are entirely my own and I have not been paid to publish positive comments.*

Thank you to my sponsor!:

Selasa, 09 November 2010

Tricky Tricky! (Window treatments)

Howdy! I still haven’t heard from two of the winners of the HomeGoods cards -- Cammy and Stephanie, holla at me!

So, remember when I showed you the start of our bedroom redo a couple of months ago? Remember the purple drapes?:

rust and chocolate bedding

Oh my. They were looking pretty sad.

They were left over from the room before…and before. :) But obviously it was time for them to go. Then one of my lovely readers, Missy, told me about some drapes online at JCPenney – they were beautiful, they were the rust color I wanted, they had long lengths, they were reversible, aaaand they were only $12.99 each!

Ding! Ding! Ding! SCORE.

I was sold! I love the look of really full drapes, so I got the 95” length and got four panels. I was thrilled when I got them and they were the perfect color! I showed you the drapes in this post, when I was trying to figure out the area above the bed:

Yes, I think I know what I’m doing now…but no I’m not ready to show it just yet. :) Evil, I know.  :)

So anyhoo, I knew the plain rust side was a bit much, so I was planning to add a touch of cream to pull in the colors from the new bedding. My original thought was to trim them out with a thick band of grosgrain ribbon. Or maybe even use cream fabric paint.

But that’s a LOT of ribbon for four 95” panels. And the paint idea just sounded like a headache waiting to happen. (Taping off straight lines for miles – thanks but no thanks.)

I mentioned the drapes are reversible – the back side was a beautiful buffalo check print. When I hung the drapes the night we got them, I held up the check side and hubs and I both though they may read a bit too country for our taste.

But the other day I turned them around, just to see…and oh. my. I was in LURVE. I also left the rust side on the other end of the window for a good week, just to make sure my love was real.

It was. I was hooked on the check. :)

(I showed you a peek last week in my “Mom Cave” post.)

It’s slightly shimmery, it’s got the dark rust, a lighter rust, and it’s got the cream I was looking for all this time. AND it was there in front of us all along. I love when it works out for FREE.

When it comes to hanging my drapes, there’s a few things I do that I get asked about a lot -- the first is what I do to make them look pleated. I learned this little trick from a fellow decorator I used to work with…and it right up there with the top three window treatment tips ever. (In my itty bitty opinion.)

It’s good peeps. Really good. :)

Custom made drapes (or any nice treatments) are made with drapery hooks – and the hooks are used to hang them. They give the fabric a full, pleated, custom look when hung and look like this:

I’ve made all of the treatments in our home, (up till now!). I rarely sew them (I’m a hemming tape and iron kind of girl) and when I do sew I can barely do a straight line -- so doing something like the hooks is way over my head. I tried it once and let’s just say it just didn’t go well…at all. :)

The little trick I learned doesn’t need these dodads -- all you need are your rings with hooks. Instead of clipping your drapery rings to the top of the window treatment, or putting the rod through the top of the drapes…pull your fabric up, pinch it in sections and clip the back of the fabric from behind:

Like so:

You’ll notice I used two different types of rings – half of them were $1.99 at the thrift store, but I needed more to get the full look I was going for. They didn’t have to match cause you can’t even see them! 

See? Tricky tricky! ;)

I like to clip each side of the treatment, then the middle, then do the rest in (fairly) equal sections:

pleated drapes It does not have to be perfect. At least in our house.

The end result really depends on the fabric – this fabric is perfect! It’s just stiff enough to keep the pleats standing up, even though I have them clipped a good five inches down from the top.

Every once and a while (like every six months) I need to poof them up, but otherwise it works GREAT:

If you have a thinner fabric, you can still do this, but you’ll have to clip much higher on the fabric. Does that make sense? Otherwise you’ll have floppy pleats. And no one likes floppy pleats. :)

The result is a very custom look, without the custom price (or work!):

short drapery rods

I do this with ALL of our drapes and absolutely love the look!

My second little trick is my short rods. I get a lot of questions on where to buy the short rods I use.

Well…you can’t. At least I haven’t found them -- that’s why I DIY my own. :)

Most of our drapes aren’t operational – we don’t close them for privacy because we have the roman shades. Because of that, I prefer not to use a long rod across the window. It’s just a personal thing – I don’t mind the look at all, but it can get costly to get a rod long enough to go the width of a double window.

So I just cut them myself – if it’s a wood rod, like in our family room:

family room

I just use my miter box or saw to cut a long rod down to the size I want:

Then use a drill bit to add a new hole at the ends for the finials. That’s it!

I love doing this because it makes your drapes seem fuller than they are, and you can use a cheaper rod (maybe four feet?) and cut that down, instead of a huge six or eight foot one.

For metal rods, I use a tool you can find in the plumbing department:


I think it’s about $8? You just put the pole in, tighten, and turn it so the tool can cut it. It takes a few minutes, but it’s easy!

Of course, you’ll need two sets of finials and brackets, so sometimes that can override the whole saving money on the rod thing.  ;)

(Drats.)

Have I mentioned I LOVE my new-but-not-really drapes?:

buffalo check curtains

You’ll notice in the pics above that the window is really close to the wall to the left…it seems the architects don’t consider our window treatments when building our homes! How could they NOT? Helloooo…it’s right up there with support beams and insulation and all the important stuff!

When I have a window that butts up against a wall like that, I just skip the finial. I didn’t use them at all in the Bub’s room:

window

I promise no one will notice. And if they do, give them a cookie. :)

So here’s one more shot (are you tired of seeing this spot yet?!) with our buffalo check drapes, DIY rods and pleats:

And the kitty was trying to get in every. single. shot. So here you go:

fluffy butt

:)

JCPenney’s still has the drapes for sale! Even the 108” length is only $12.99 a panel. That’s crazy good! I could not even begin to make reversible, lined drapes that length for that amount. LURVE!!

The only color left is the terra cotta color, except in the longest length, and they have a bronze/pearl combo as well in that one. That color looks lovely as well. Check them out here!

I don’t think they look country at all now – just traditional. And loverly. Me likey.

P.S. Are you singing this in your head yet?

That’s right on time it’s trickaaaaaaaaaay…

I love the 90’s.

Senin, 08 November 2010

Giveaway winners!

Hello there! I’m excited to announce the winners of my latest giveaways. FUN. :)Print

First up, the randomly selected winner of the TEN craft kits for you and nine of your friends (a $250 value!) is…

MelKel from For the LOVE of cooking!

Congrats! You can email Alison at alison (at) howdoesshe (dot) com to get connected for your kits. Have fun! :)

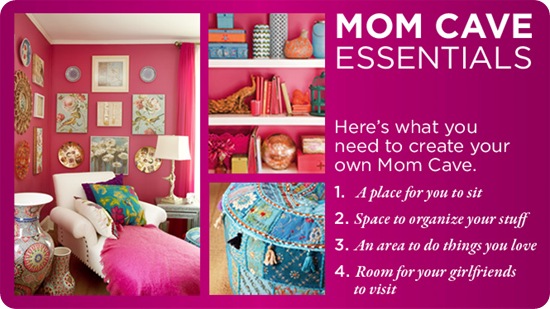
There was a HUGE response to the HomeGoods Mom Cave giveaway!:

mom-cave-essentials

The FOUR winners of the $50 gift cards are:

1. Cammy from Live to Learn
2. Stephanie from Good Bones Home
3. Amanda from Our Humble A(Bowe)d
4. Sarah from Our Cozy Robbins Nest (Random.org came up with #1 for the last one, out of more than 1600 entries! Whoa!)

CONGRATS all!! :)

Please send an email with your names and addresses to thriftydecorchick (at) gmail (dot) com so I can send you your gift cards. :)

And for everyone else…hang in there, I’ve got some more great giveaways coming up over the next month!

Minggu, 07 November 2010

Get ready (cause here it comes!!)

Well hellooo! Hope you had a great weekend! We did a whole lot of marching band and not much else. :)

I just finally got all of the Halloween decor down a couple of days ago. (Well, except for the orange lights out front. And the stuff I forgot in the garage. And the trinkets in the car. And the nightlight in the Bub’s room.) But other than all that…it’s all put away.  :)

And now I’m really starting to think about the upcoming holidays – and getting really excited! Our season last year was full of all kinds of bad news – my father-in-law was diagnosed with pancreatic cancer, and then weeks later we lost my mother-in-law.

Needless to say, we just couldn’t get to everything -- it was the first year I can remember that I didn’t send out Christmas cards. I know it’s no big deal in the scheme of things, but that in particular really got me thinking about preparing for the holidays this year. So for the past few weeks, I’ve been making a list of the things I want to get done well before the end of the month!

First up…address our Christmas cards and get them ready to mail:

(Click on photos for sources.)

Guess how many boxes of cards I found in the basement last year? That would be THREE. I think we’ll have plenty. ;) Now, getting all four of us together for a decent Christmas photo – that’s the hard part.

I still hand address our Christmas cards – I actually quite enjoy it! I find it relaxing, and add in some Christmas music and hot chocolate and it makes for a lovely little tradition of my own. :)

Next up – going through the pile of toys:

OK, I may be exaggerating. Just a smidge. A skosh. Really, not much. Not at all. :)

The Bub’s birthday and of course Christmas are both in December – so we get the influx of new toys for the year within a span of a few weeks.

I. must. prepare.

I. must. prepare. when the Bub isn’t home.  ;)

Third on my list is to make a list and check it twice (wink). A few weeks ago I started a list of folks I don’t want to forget at the holidays -- there’s the mailman, the Bub’s teachers, friends and family of course. But also some folks we haven’t given to before – like the day care staff at our Financial Peace class, the waitresses at our favorite restaurant (if it tells you anything, they know us by name), and some of the great contacts I’ve made through blogging.

A few will get some of my yummy strawberry jam I made back in the summer:

strawberry freezer jam

It sure is good!! I know…I’ve already eaten a couple of the “gifts” myself.

And finally, because our kiddo is almost four and getting more fun with each passing day, I want to create new traditions that he’ll remember year to year.

I’ve heard the Elf on the Shelf can be quite labor intensive (on you-know-who’s part), but oh my goodness they are too stinkin’ cauuuute!:

the elf

Just look at that face!!

I guess he “watches” over the kids for Santa, yes? And he moves around the house every night, finding a different spot to hide. ACK! Adorable. Right up my alley baby.

And I kind of have a thing for advent calendars. Last year we got this cute Lego calendar:

2824-0000-xx-12-1

My friend Richella told me about it, and even though the Bub was still a bit small, I couldn’t resist! He LOVED it.

I have a couple advent versions I’ve made and I highlighted them last year here. The little cardboard boxes are my favorite:

I love finding advent calendars you can make on your own – on a recent browsing trip through Pottery Barn Kids, we found both of these:


The tree is especially adorable just because it’s more than five feet tall and HUGE…but at $70, my mind immediately went into gear thinking how (relatively) easy it would be to make this one on the cheap! A huge piece of green felt, scraps of holiday fabrics and little embellishments and you could totally do this one on your own!

And Pottery Barn has a couple of advent calendars in stock, but this is the one that absolutely kills me:

Yes, because it’s pretty and adorable and a really cute idea. But it really kills me because it’s priced at $299. Gah, excuse me while I choke a little. What the what??

I know it would take some time, but some branches from a tree, (you don’t really have to use branches – how about some dowel rods?), some twine and 25 little spray painted buckets…you’ve got yourself an equally adorable advent calendar…for about $250 cheaper? Maybe?

I’d like to get my prep for the holidays done this week, so I can focus on Thanksgiving and then the Christmas decorating!! Whoooohoo!

How do you prepare for the holidays? Do you have any fun family traditions? Have you made your own advent calendar? Be sure to tell us about them or if you’ve blogged about one – link it up in the comments! We all could use a little help making the magic happen.  :)

Christmas is only SEVEN weeks away! Can you even believe it??

**You can enter the Makia Creations and HomeGoods Mom Cave giveaways until Monday at noon. And there’s still a bit more time to link up your before and after project for this month here!